At moment it can do two things:
- Adjust the colors of one (masked) image so it matches as well as possible with another. Thus you do not have to manually adjust color curves to merge several photographs into the same texture.
- Filter out low frequencies from image (while keeping the average intact). This can be used both for the creation of seamless textures and for removing shade gradient from uniform surfaces (like walls, doors, whiteboards...) Highpass filter supports masking (in polynome mode), so you can mask out those details whose contribution you want to ignore (like pictures on wall).
Polynomic highpass filter with masking
We want to use the following image as a texture. Unfortunately the background color is non-uniform and adjusting it by hand is boring work
 |
| The original image - notice the non-uniform shading of the wall |
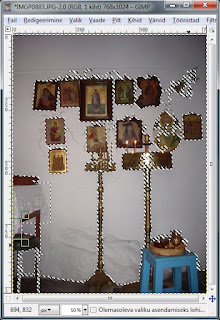
In given case I used magic want to select white and then added and subtracted few rectangles.
 |
| Target region selected |
 |
| Target region turned into mask |
 |
| The Texturewerke dialog window |
Next we apply filter.
 |
| Masked image after applying polynome filter |
As the last thing, we delete (or turn off layer mask).
 |
| The final image - wall color is now uniform |
There are few things to notice:
- Polynome mode tries to approximate the average color of the image by two-dimensional polynome (up to 4th degree). The approximation process guarantees the correct behavior of the polynome only inside target region - the higher is its degree the faster it goes "wild" outside. Thus if you mask out some edges of the image the results probably will not look nice for anything above quadratic (2th order).
- The unmasked area has to be at least 10% of original image
- Samples are drawn randomly from unmasked area.
- There is another highpass filter mode "blur", that subtracts blurred (lowpass) version of the same image. It does not support masking - but it may be more useful for the generation of highly uniform images (like grass and sand textures).
Have fun!
Thank you for sharing
ReplyDeleteافضل شركة نقل عفش من الرياض الى القصيم
افضل شركة نقل عفش من الرياض الى المدينة المنورة
ارخص شركة شحن من السعودية للكويت
شركة نقل عفش من الرياض الى البحرين
Satisfied with all the information I found in this article. Very helpful.
ReplyDeleteImpressive! Thanks for giving me a fabulous idea here.
ReplyDeleteThis type of clever blog work and coverage! Keep up the great works
ReplyDeleteThe text was neat and readable. Great blog. Thanks for blogging.
ReplyDeleteI am very happy to read this article .. D.
ReplyDeletethanks for giving us go through info. D.
ReplyDeleteI appreciate this post. D.
ReplyDelete