Saturday, December 17, 2011

Matching image colors with Texturewerke

In the last post I demonstrated how to use TextureWerke for masked polynome high-pass filtering. In addition to that, TextureWerke 0.1 has another feature - matching colors between two (masked) images.

Workflow

Let's start with two images of stone wall we want to merge into one texture:

First image - a plain wall

Second image - a corner made of bricks

As you can see (among other things) the images have a bit different colors - the first one has more contrast and red. The bright background of the second picture influenced camera color adjustment logic so that the wall is more gray and has less contrast.
We will correct this automatically. First we move both photos to the same image (not necessary, but easier to compare) and add masks. We mask out all details that we do not want to influence final color - i.e. roof, shaded areas, brick structures, grass and background.

Masked images on top to each other.

Next we select the masked layer whose colors we want to change (Layer 2), invoke TextureWerke and choose color matching mode.

TextureWerke dialog window in color mode

Template is the (masked) layer whose color profile we want to emulate in selected layer.
Blurring reduces the noisiness of distribution curves and thus helps to overcome artefacts resulting from different sharpness of images. On the other hand it may mask out certain differences in color distribution and thus reduce the matching quality. You can always try and use what gives the best results.
And at last we apply the filter.

Image with adjusted colors

As you can see, the overall color and contrast of the (stone part of) wall matches with template image. On the other hand the areas that were masked out (bricks, backround...) are now completely off. But probably we did not want to use these anyways - except bricks maybe - but these can easily be copied and pasted from the original, and adjusted separately.

FYI: Internally the algorithm works by comparing pairwise the cumulative distributions of each image channel (R,G,B,A) and building a transfer function that translates the values with one distribution to the values with another (template) distribution.

And that's all. Have fun!

Thursday, December 8, 2011

Texturewerke 0.1

While doing textures for Shinya (the game with Khayyam/Sehle engine) I got frustrated with GIMP built-in tools and plug-ins available for texturing and decided to write my own tool Texturewerke. The initial version is now available for download from SourceForge:
At moment it can do two things:
  1. Adjust the colors of one (masked) image so it matches as well as possible with another. Thus you do not have to manually adjust color curves to merge several photographs into the same texture.
  2. Filter out low frequencies from image (while keeping the average intact). This can be used both for the creation of seamless textures and for removing shade gradient from uniform surfaces (like walls, doors, whiteboards...) Highpass filter supports masking (in polynome mode), so you can mask out those details whose contribution you want to ignore (like pictures on wall).
Below is one possible usage scenario of Texturewerke highpass filter.

Polynomic highpass filter with masking

We want to use the following image as a texture. Unfortunately the background color is non-uniform and adjusting it by hand is boring work

The original image - notice the non-uniform shading of the wall
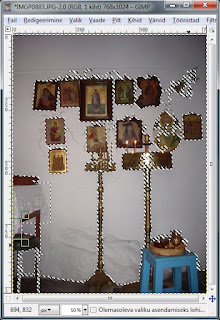
We select the are that we want to have uniform color (the wall). It does not have to be precise - the filter samples few thousand points from target area and thus small regions of wrong color do not disturb the result much.
In given case I used magic want to select white and then added and subtracted few rectangles.

Target region selected
Now we turn target region into mask, bu choosing "Add Layer Mask" from Layer menu.

Target region turned into mask
Next we invoke Texturewerke plugin and select "Lowpass" filter and "Polynome" mode.

The Texturewerke dialog window
It blurs image (internally) before calculating polynome approximation. The optimal size of kernel depends on image and the number of samples used. As general rule - the more samples it uses, the smaller can be the kernel.
Next we apply filter.

Masked image after applying polynome filter
As you can see, the unmasked area has almost uniform color/bightness now.
As the last thing, we delete (or turn off layer mask).


The final image - wall color is now uniform
 And the final image has now nice uniform wall color.

There are few things to notice:
  • Polynome mode tries to approximate the average color of the image by two-dimensional polynome (up to 4th degree). The approximation process guarantees the correct behavior of the polynome only inside target region - the higher is its degree the faster it goes "wild" outside. Thus if you mask out some edges of the image the results probably will not look nice for anything above quadratic (2th order).
  • The unmasked area has to be at least 10% of original image
  • Samples are drawn randomly from unmasked area.
  • There is another highpass filter mode "blur", that subtracts blurred (lowpass) version of the same image. It does not support masking - but it may be more useful for the generation of highly uniform images (like grass and sand textures).

Have fun!